Guide
How to draw a film lighting plan
For gaffers, best boys and anyone drawing the plan for a lighting department.
A lighting plan is a top-down drawing of the set showing where every lamp, frame and cable run goes. A good one lets the rigging gaffer, best boy and sparks set up without asking you where things go. This guide covers how to put one together, from getting a floor plan to sending it to the crew.
1. Start with a floor plan
You rarely have to draw the location from nothing. The usual sources are:
- Studio plans. Most stages have a floor plan, and set builds often come as a drawing or a SketchUp export from the art department.
- The art department or location. Ask early. Expect it to be revised during the job, so keep your plan separate from the drawing underneath it.
- Satellite images for exteriors. When lamps go outside a house, a screenshot from Google Earth or Maps shows the garden, street and where a generator or truck can park. Put the house plan on top of it.
If there is nothing, sketch it on the recce: walk the rooms, measure the walls, and mark doors, windows and stairs. Rough is fine as long as the measurements are right.
2. Set the scale
A plan is only useful if distances are real. Find something on the drawing with a known length, such as a scale bar, a wall you have measured or a door, and use it to set the scale. Once that is done, lamps can be drawn at their actual size, so an 18K sits correctly against a 300W, and you can see straight away whether a frame fits outside a window or a stand fits in a corridor.
3. Place the lamps
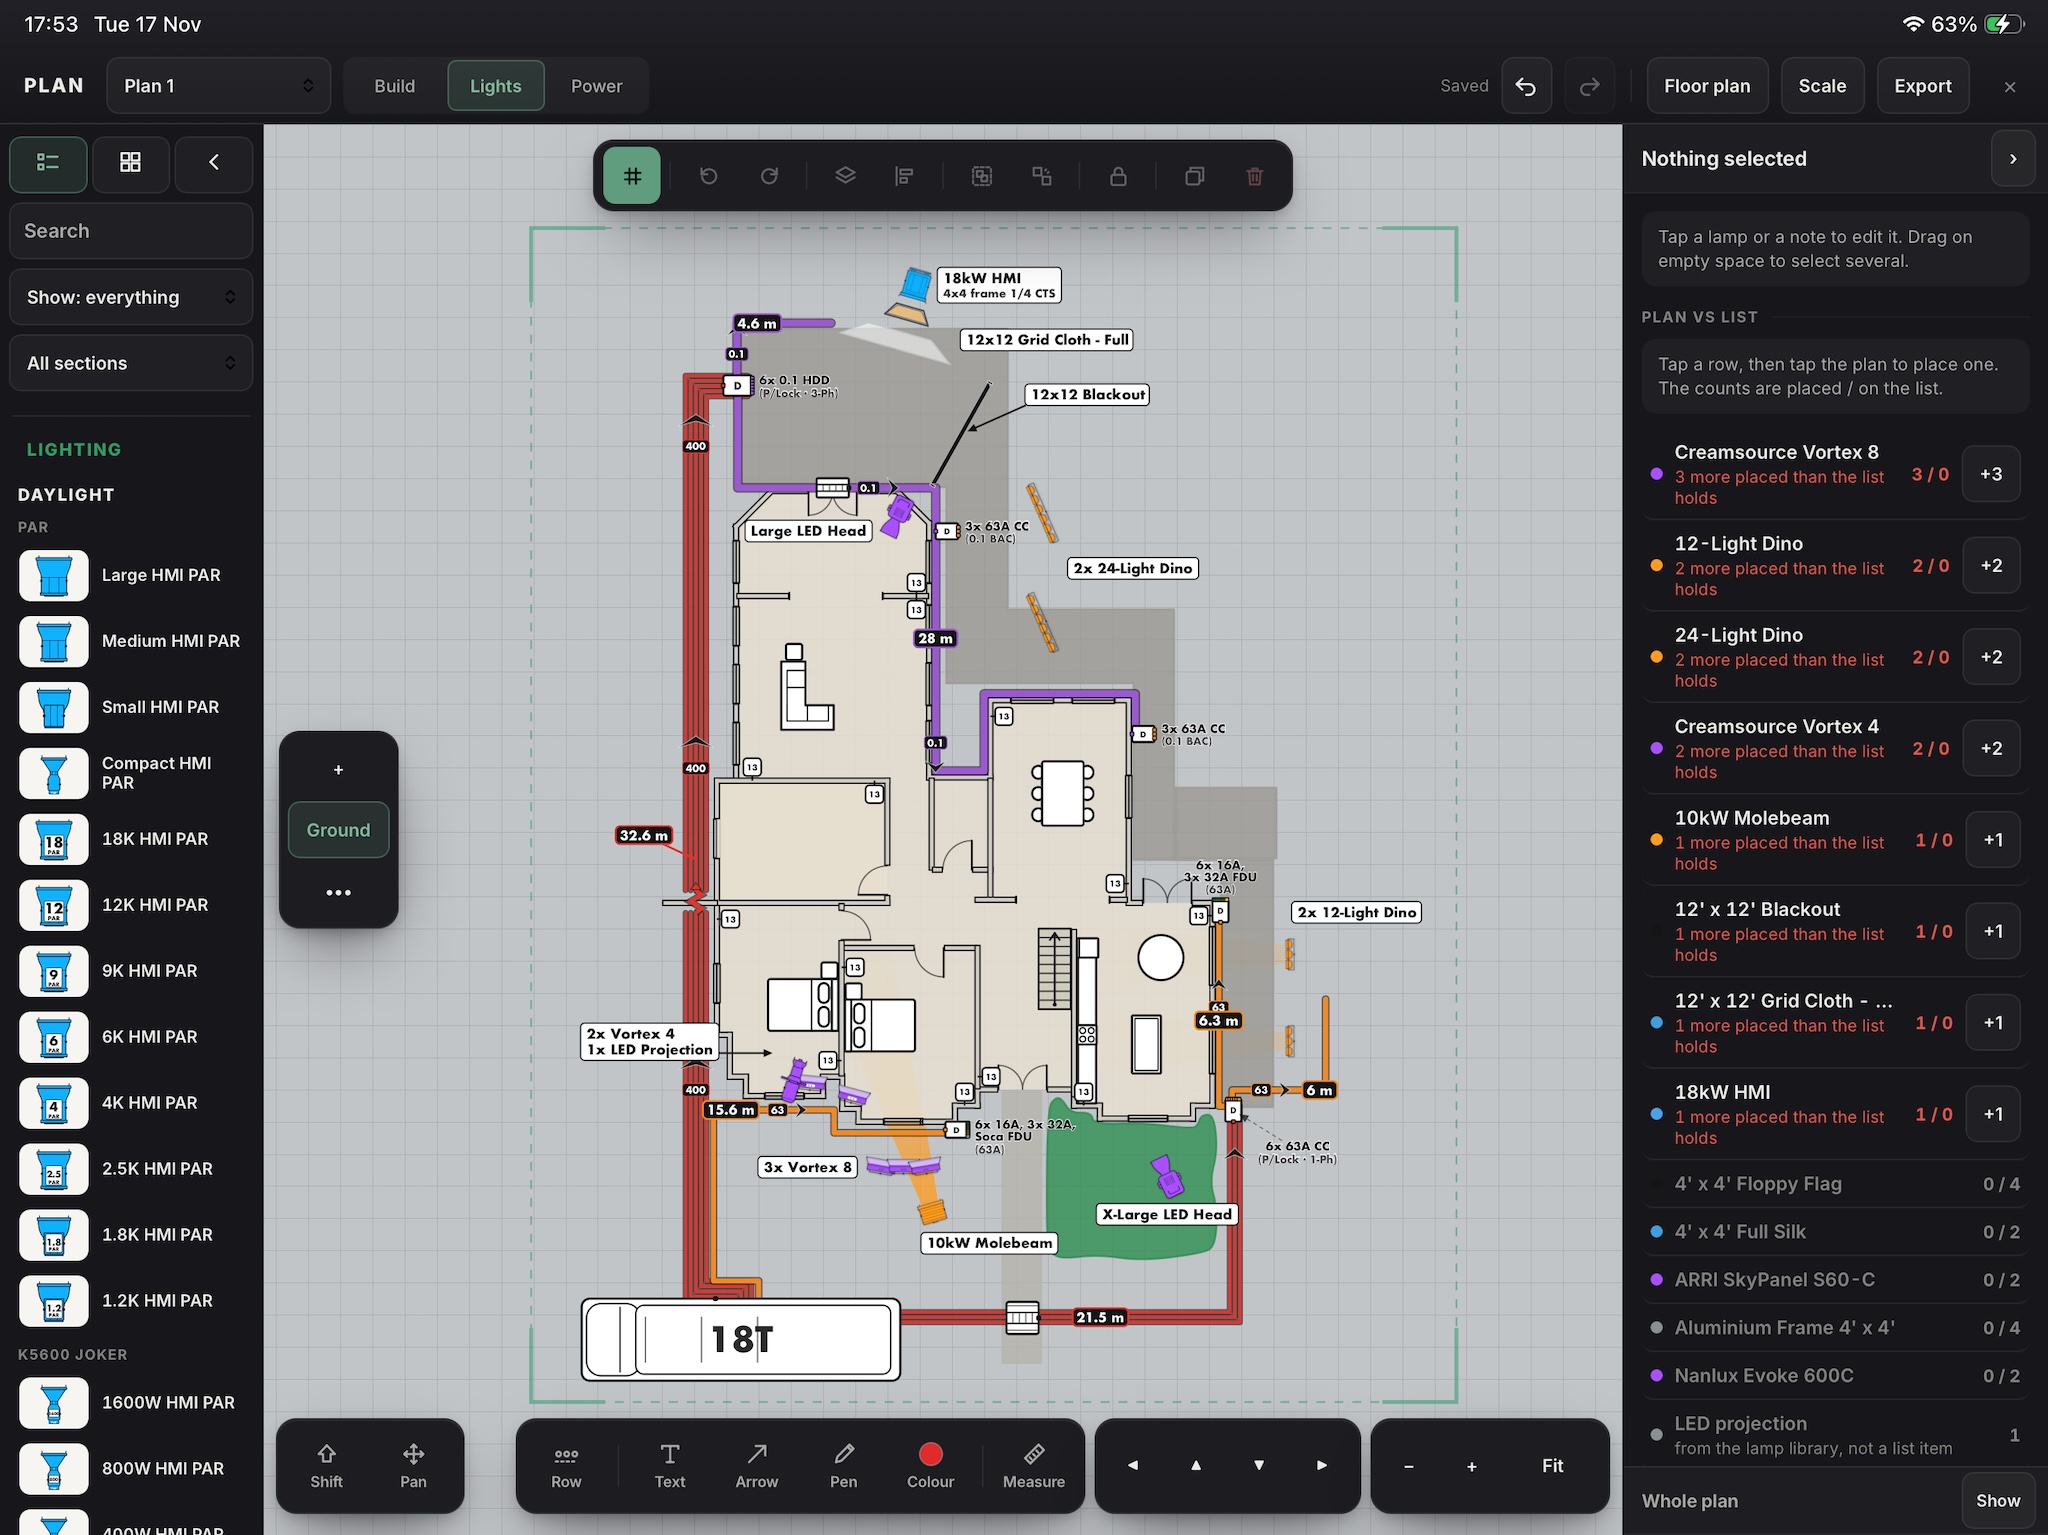
Draw every lamp seen from above. A light pointing down shows its back, not its lens. Colour code by source so the plan reads at a glance:
- Blue for HMI and daylight
- Orange for tungsten
- Purple for LED
Add frames, flags and textiles in front of the lamps they work with. For overhead rigs, such as rows of panels or spacelights, draw them as a group with a single label (for example "20x S60 spacelights") rather than labelling each one.
4. Label clearly
Keep labels short. The lamp name is usually enough on a simple plan. When it gets busy, number each lamp or group and put a chart underneath with the detail. Useful columns:
- Number
- Fixture
- Stand or rigging (what it hangs from)
- Height
- Gel and diffusion
- Spot or flood
- Dimmer or DMX channel
- Notes
Use coloured note boxes so the crew can find things quickly. A common system: yellow for set notes, red for power notes and black for everything else.
5. Mark the power
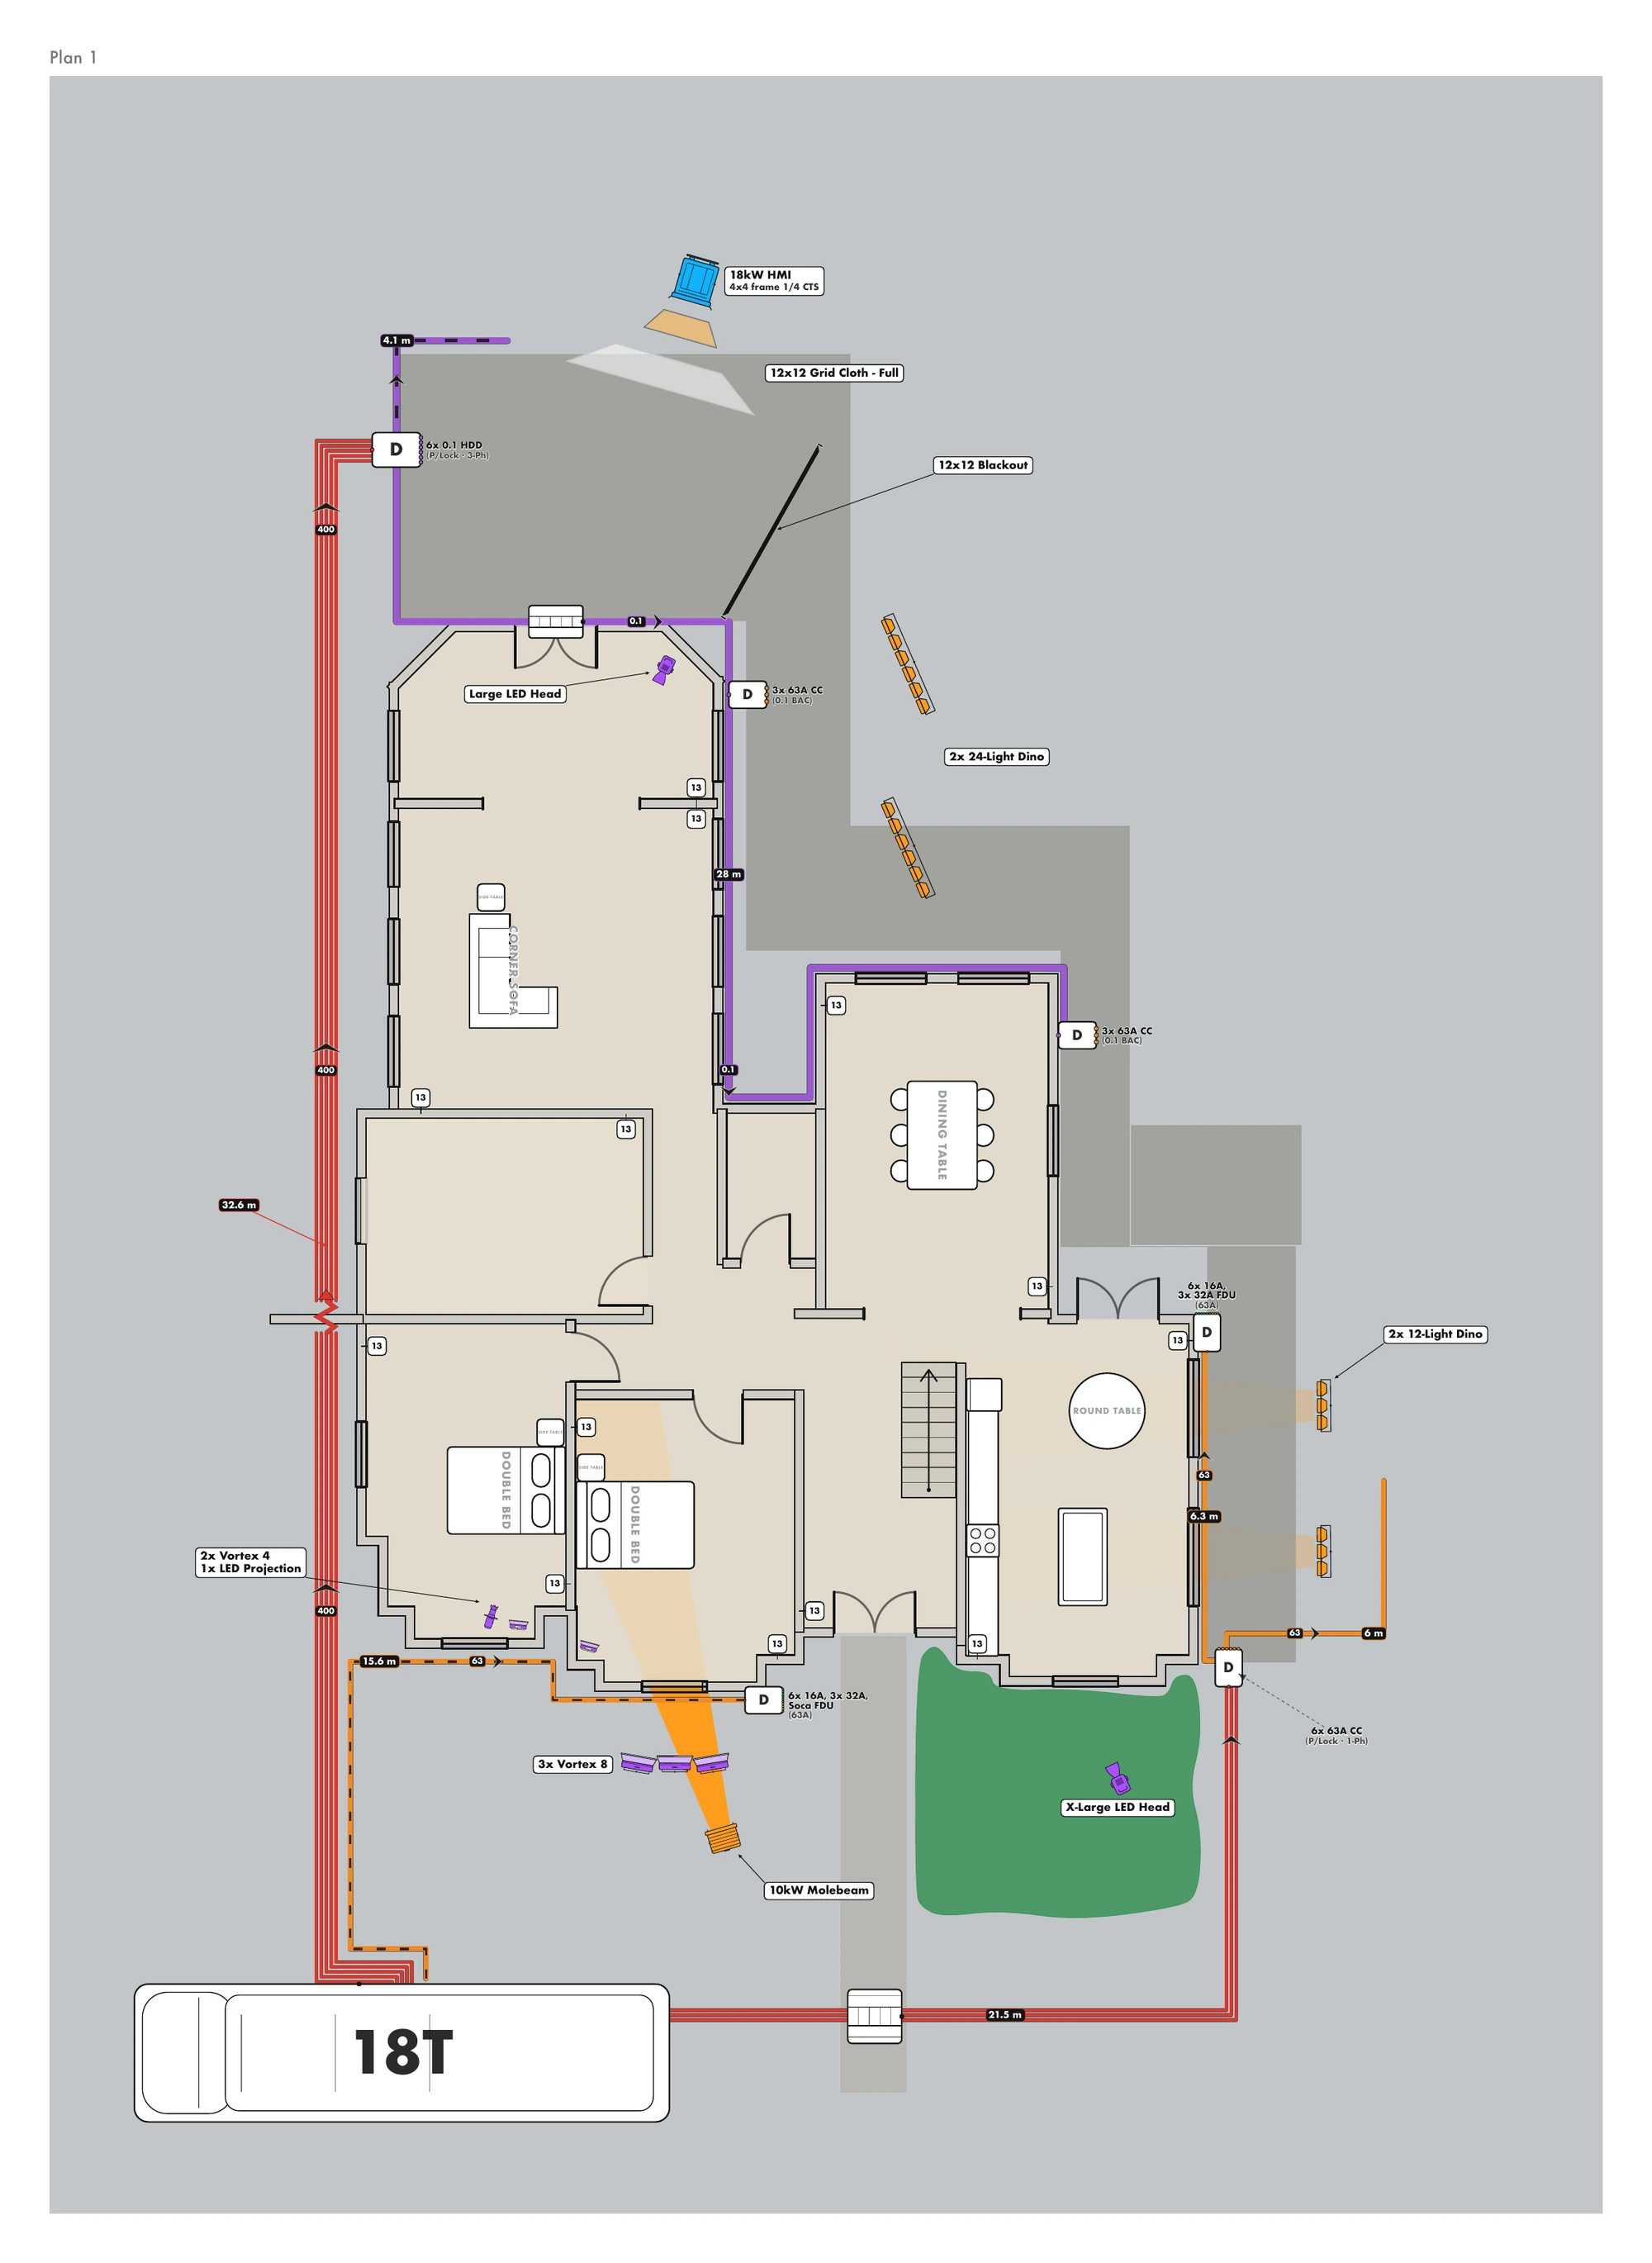
Show where the power comes from (generator, studio supply or house power), where the distro boxes go, and the cable runs between them. Colour code runs by size so nobody has to read the labels:
- Green 16A
- Yellow 32A
- Orange 63A
- Purple 150A (0.1)
- Red 400A (Powerlock)
Dots on a run can mean 3 phase, and dashes Socapex. Add a key to the plan. Run lengths are worth noting too: they give the best boy a ball-park figure for the cable order, to be checked on the recce. On exteriors, mark where the generator and trucks will park.
6. Plan first, or list first
Often the plan comes before the kit list. A rough plan shows what the scenes need, the list is built from it, and the plan is finished once the final package is agreed with the hire company. Expect a lot of cutting and changing on the way. Keep the plan and the list in step: if a lamp is cut from the list, take it off the plan.
7. Send it to the crew
The plan usually goes to the rigging gaffer, best boy and sparks, and sometimes the art department and production. Most of them will open it on a phone. Export it as a PDF or image that reads when zoomed in on a phone screen, and name the file clearly with the job and the set or location. If the plan changes, send it again with a new version number, so nobody rigs from an old one.
Do it in LiteKit
LiteKit is a kit list and lighting plan app for the iPad. Bring in a floor plan or draw the location, set the scale in two taps, place lamps at their real size straight from your kit list, run colour coded cable and export the plan for the crew.